
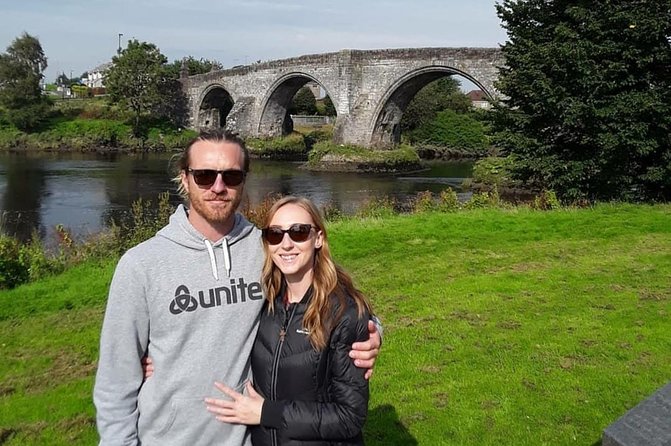
Reviewed · STIRLING AND BATTLEFIELD TOURS
Braveheart (Battle of Stirling Bridge) Tour
The Battle of Stirling Bridge was not won on the broad stone bridge you see today. This short walking tour helps you picture the vanished wooden crossing, the trap set for the English army, and the Scottish victory of 1297. Guide Steven brings the story to life with maps, a tablet, and even a model of the original bridge.
I like the small group, capped at 15 people, and the way the tour deals with the real William Wallace rather than the movie version. I also like the warm, personal welcome that Steven and his family bring to the experience. The main drawback is its narrow focus: you will stand outdoors for much of the hour, and the tour works best if you already have a strong interest in Scottish history.
Key points to know before you book
- The original wooden bridge is gone: Steven uses images and a model to show where it stood and how it collapsed during the battle.
- Wallace is only part of the story: Andrew De Moray receives proper attention as a key Scottish commander.
- The group stays small: A maximum of 15 people allows time for questions and discussion.
- The tour is brief but focused: Plan on about 1 hour to 1 hour 15 minutes, all near Stirling Old Bridge.
- The setting is outdoors: You will not tour a museum or preserved battlefield structure, and poor weather can affect the outing.
- The movie gets corrected: Expect a clear look at the differences between Braveheart and the historical record.
Stirling Bridge, where the battle begins
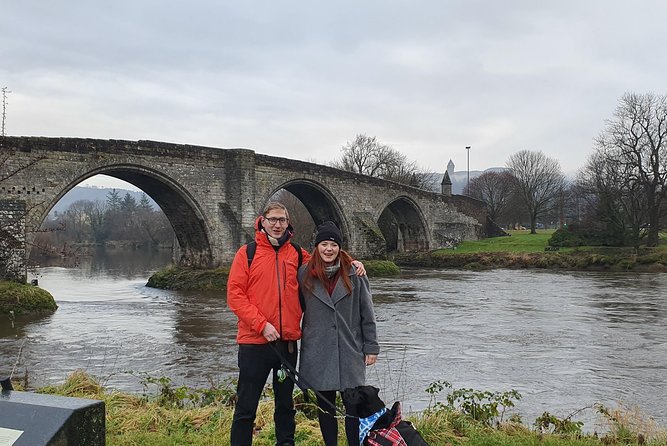
You meet on Laurencecroft Road, beside Stirling Old Bridge and the River Forth. The activity starts and finishes at this same point, making it simple to fit into a day in Stirling.
The modern bridge is not the one that gave the battle its name. The original wooden bridge stood nearby, but no physical trace remains. That fact shapes the entire tour. You are not walking among preserved walls or standing beside surviving medieval timber. Instead, you use the river, the road, the bridge, and Steven’s visual aids to rebuild the scene in your mind.
This is a good lesson in how history often works. The most important object in the story has disappeared, yet its position mattered enormously. The narrow crossing limited how many English soldiers could reach the Scottish side at one time. The delay allowed Wallace and Andrew De Moray to attack a divided force rather than face the full army at once.
Steven’s tablet helps show possible locations for the old bridge and gives you a clearer sense of the ground. He has also built a model of the bridge with his father. It is an unusual detail, and a useful one. A small model can explain the battle more quickly than a long speech because you can see how the crossing controlled movement.
More history on the ground near Scotland:
- Loch Lomond, Kelpies & Stirling Castle Tour Including Admission
★ 4.5 · 1,305 reviews - Edinburgh: Loch Lomond, Stirling Castle and the Kelpies Day Tour
★ 4.5 · 1,198 reviews - Loch Ness & Culloden Battlefield Private Tour from Inverness
★ 5.0 · 932 reviews
Rebuilding the Battle of 1297
The tour follows the story from the early lives of Wallace and De Moray through the moments that placed them at the center of Scotland’s Wars of Independence. You learn how their paths led to the battle, how the Scottish force used the bridge, and how the victory became one of the defining events in the struggle against English rule.
The focus is not simply on Wallace as a lone hero. Andrew De Moray is given an important role, which matters because films and popular retellings often reduce the battle to one famous man. Here, you get a fuller account of the commanders and the choices that shaped the result.
The bridge itself is the key to understanding the action. A large army could not cross in a single wave. Once enough English soldiers had reached the Scottish side, Wallace and De Moray attacked. The bridge then collapsed, leaving many soldiers cut off and helping the Scottish force win a major victory.
You should expect a story-led walk rather than a long-distance hike. One former participant described little walking but some standing, and that is a useful guide to the physical demands. The challenge is more about listening outdoors than covering ground.
The real William Wallace, not just Braveheart
The title uses the familiar movie name, but the tour takes pains to separate cinema from evidence. That is one of its strongest features.
The 1995 film helped make Wallace famous around the world, but it changed major details for drama. Clothing, romance, timelines, characters, and battle scenes do not always match the historical record. Steven addresses these errors directly, without letting the film take over the whole experience.
That approach suits visitors who have arrived in Scotland because of the movie but want something more accurate. You can enjoy Braveheart as entertainment and still learn what actually happened at Stirling Bridge. The tour gives you that correction without requiring you to already know the subject.
Steven’s style also appears to be conversational rather than purely academic. He answers questions, discusses alternative theories, and explains where evidence is uncertain. That last point is important. Since the wooden bridge no longer survives, some details about its precise position and the battle’s movements remain open to interpretation.
You are not being handed a neat story with every question settled. You are shown what is known, what is debated, and why different locations have been suggested. For a short tour, that makes the history feel more honest.
Steven’s personal way of telling the story
Steven is the main guide named in the tour information and the responses to visitors. His strength is clear: he combines detailed historical knowledge with a friendly local welcome.
Several personal touches help explain the tone. He refers to his father, who helped build the bridge model, and to Molly, the family dog associated with welcoming people to Stirling and Bannockburn. His replies also show that hospitality is a major part of how he sees the tour. You may receive more than a standard set of facts, particularly if the group is small and has time for questions.
One unusual detail is that a participant referred to him as David. Steven responded with humor, explaining that David is a common mistaken name for him. This tells you something useful about his manner: he does not appear to take himself too seriously, even while treating the subject with care.
The small size helps here. With no more than 15 people, you can ask about the bridge, Wallace, De Moray, or the movie without trying to catch a guide’s attention across a large crowd. Some departures may be much smaller, although you should not count on having a private tour.
Same base, a completely different day out:
- The World Famous Underground Ghost Tour
★ 4.5 · 9,272 reviews - Underground Vaults Walking Tour in Edinburgh Old Town
★ 4.5 · 8,506 reviews - Loch Ness, Scottish Highlands, Glencoe and Pitlochry Tour
★ 5.0 · 6,854 reviews - Loch Ness & Highlands Small-Group Tour from Edinburgh with Cruise
★ 4.5 · 6,022 reviews
Why the short format can work well
At about 60 to 75 minutes, this is not an all-day battlefield study. That is both a benefit and a limit.
I like the compact format for a first visit to Stirling. You can add it before or after other sightseeing without surrendering half a day. The meeting point is close to Stirling Old Bridge, and the walk ends where it begins, so you do not need to arrange a separate pickup or find your way back from another part of town.
The short duration also keeps the story focused. You get the battle, its commanders, the bridge, the aftermath, and the later legacy. You are unlikely to become lost in a long list of dates.
On the other hand, anyone wanting a full study of the Wars of Independence will need more. The tour cannot cover every campaign, castle, political alliance, or military detail in just over an hour. It also does not replace a visit to other Stirling attractions.
Think of it as a focused introduction to one decisive event. It gives you context for the area and helps you see Stirling Old Bridge with greater understanding.
What you are really paying for at $34.45
At $34.45 per person, the price is reasonable if you want interpretation rather than a self-guided walk. You can look at the river and bridge area for free, but without help you may not know where the old wooden bridge stood or why the crossing shaped the battle.
The value comes from Steven’s explanation, visual material, and ability to discuss competing theories. The model of the bridge is especially useful because the original structure is gone. You are paying to make an invisible site understandable.
The price is less appealing if you only want a quick photograph or a general introduction to Wallace. The area itself can be visited without an admission ticket, and the tour is not built around a large collection of objects or a preserved ruin.
For someone interested in Scottish independence, the cost makes more sense. You get a concentrated hour with a guide who focuses on this specific event rather than offering a broad, surface-level city walk.
The tour is offered in English, and a mobile ticket is provided. It is often booked about 22 days ahead, so planning early is sensible if your schedule in Stirling is tight.
Weather, standing, and practical comfort
This is an outdoor experience, and weather matters. The activity may be canceled in poor conditions, with the choice of another date or a full refund. Scotland can bring rain, wind, or sudden cold even when the forecast looks promising, so wear suitable clothing and shoes.
You will not walk far, but you may stand while Steven explains the battle. The tour data says most people can participate, and service animals are allowed. It is also near public transportation.
Bring your phone with the mobile ticket ready, and allow enough time to locate Laurencecroft Road and the old bridge. Since the activity ends at the meeting point, you can plan lunch or another attraction afterward without making a complicated return journey.
Free cancellation is available up to 24 hours before the start time. Cancellations or changes made inside that window are not refunded or accepted. The local start time controls the cut-off.
One operational failure has been recorded: a guide once missed a scheduled departure and apologized, offering a refund and another date. That appears to have been treated as a serious mistake, not a normal feature of the tour, but it is a reminder to keep your booking details and contact information handy on the day.
Who will enjoy this most
I would choose this tour for you if you want the following:
- A clear explanation of the Battle of Stirling Bridge
- More attention to Andrew De Moray than the movie usually allows
- Help separating Braveheart fiction from historical evidence
- A small group and time for questions
- A short activity that fits into a wider Stirling itinerary
- A personal guide with strong local ties
It suits families with older children who can listen while standing, film fans who want the real story, and anyone building a trip around Scotland’s Wars of Independence.
It is less suitable if you dislike history talks, need a fully indoor activity, or expect a large battlefield with visible medieval remains. The bridge is gone, and the tour depends on explanation rather than surviving structures.
You may also want more time if you are fascinated by the wider conflict. In that case, pair this experience with other Stirling sites or with a tour focused on Bannockburn. The guide also offers a Bannockburn tour, and one couple combined both on the same day.
My verdict on the Stirling Bridge tour
I would book this if Stirling Bridge is more than a quick stop on your route. The battle is easy to misunderstand when the bridge has vanished and the film version has become so familiar. Steven’s maps, tablet images, bridge model, and clear storytelling give you a practical way to picture what happened.
The strongest reason to go is not the scenery or the length. It is the chance to understand why this crossing mattered and why Wallace and De Moray’s victory was so important. The warm welcome is an added benefit.
Book it if you enjoy focused history, outdoor storytelling, and honest corrections to popular myths. Skip it if you want a scenic walk with little commentary or a substantial museum-style visit. For the right audience, $34.45 buys a useful hour of context that can change how you see Stirling.
FAQ
Where does the tour begin?
It begins at Stirling Old Bridge, on Laurencecroft Road beside the River Forth, Stirling FK8 1AQ, UK.
Where does the tour end?
The activity ends back at the meeting point.
How long does the tour last?
The tour lasts approximately 1 hour to 1 hour 15 minutes.
What does the tour cover?
It covers the Battle of Stirling Bridge, the original wooden bridge, William Wallace, Andrew De Moray, the events leading to the victory, their later lives and deaths, and their legacy.
Is the original wooden bridge still visible?
No. There is no real trace of the old wooden bridge. The guide uses visual material and a model to explain its possible location and role in the battle.
How large is the group?
The tour has a maximum of 15 participants.
Is the tour offered in English?
Yes. The tour is offered in English.
What happens if the weather is poor?
If poor weather causes the tour to be canceled, you will be offered another date or a full refund. You can also cancel up to 24 hours before the start time for a full refund.
Just added around Scotland
- ULLAPOOL PORT Cruise Ship Tour, Ardvreck Castle, Rocks & More★ 5.0 · 5 reviews
- Northern Islands RIB Tour★ 5.0 · 15 reviews
- Full-Day Private Speyside Malt Whisky Trail Tour from Grantown-on-Spey★ 5.0 · 22 reviews
- Full-Day Walking and Hiking Adventure in Quinag Mountain Range★ 5.0 · 20 reviews
- Guided Walks in Grantown-on-Spey★ 5.0 · 35 reviews
- Explore Glenfinnan – Adults★ 5.0 · 5 reviews
- Dunrobin Castle Private Tour★ 4.0 · 4 reviews
- 2 hour private surf lesson! (Up to 2 people)★ 5.0 · 63 reviews
Stirling and Battlefield Tours, compared.
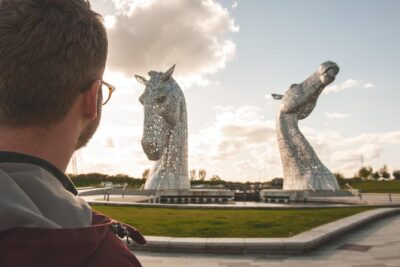
Loch Lomond, Kelpies & Stirling Castle Tour Including Admission
Read our review →
Loch Lomond, Stirling Castle and the Kelpies Day Tour
Read our review →
Loch Ness & Culloden Battlefield Private Tour from Inverness
Read our review →
Rosslyn Chapel, Dunfermline Abbey and Stirling Castle Day Tour
Read our review →
Stirling Castle, Loch Lomond and Cruise Day Tour from Glasgow
Read our review →
Stirling Castle and Whisky Very Small Group Tour from Edinburgh
Read our review →
Browse the lists this tour appears in